Quick start
Most customers should only need these steps to get the add-on working.
- Open the add-on in ServiceM8.
- Connect Xero if it is not already connected.
- Leave Automation enabled.
- Approve the invoice or job to Xero in ServiceM8.
- The add-on processes it automatically in the background.
- You do not need to keep the dashboard open for processing to happen.
- Emailing an invoice from ServiceM8 on its own does not trigger the add-on.
- The add-on starts after the invoice or job is approved to the connected accounting package from ServiceM8.
- The goal is to help approved ServiceM8-sent invoices avoid remaining unsent in Xero, which can block reminders and other automations.
Activation and connection
This is the sequence customers should follow when installing and connecting the add-on for the first time.
Open the add-on in ServiceM8
Start from the add-on in ServiceM8 and follow the activation flow. Once activation completes, return to the add-on settings screen.
Connect Xero
Use the Xero connection option in the add-on settings. Choose the correct Xero organization when prompted, then return to the add-on.
Enable automation
Confirm that automation is enabled. Once connected, leave the add-on ready in the background while your team continues its normal workflow.
Add-on settings overview
Dashboard screenshot
 Main add-on settings screen
Main add-on settings screen
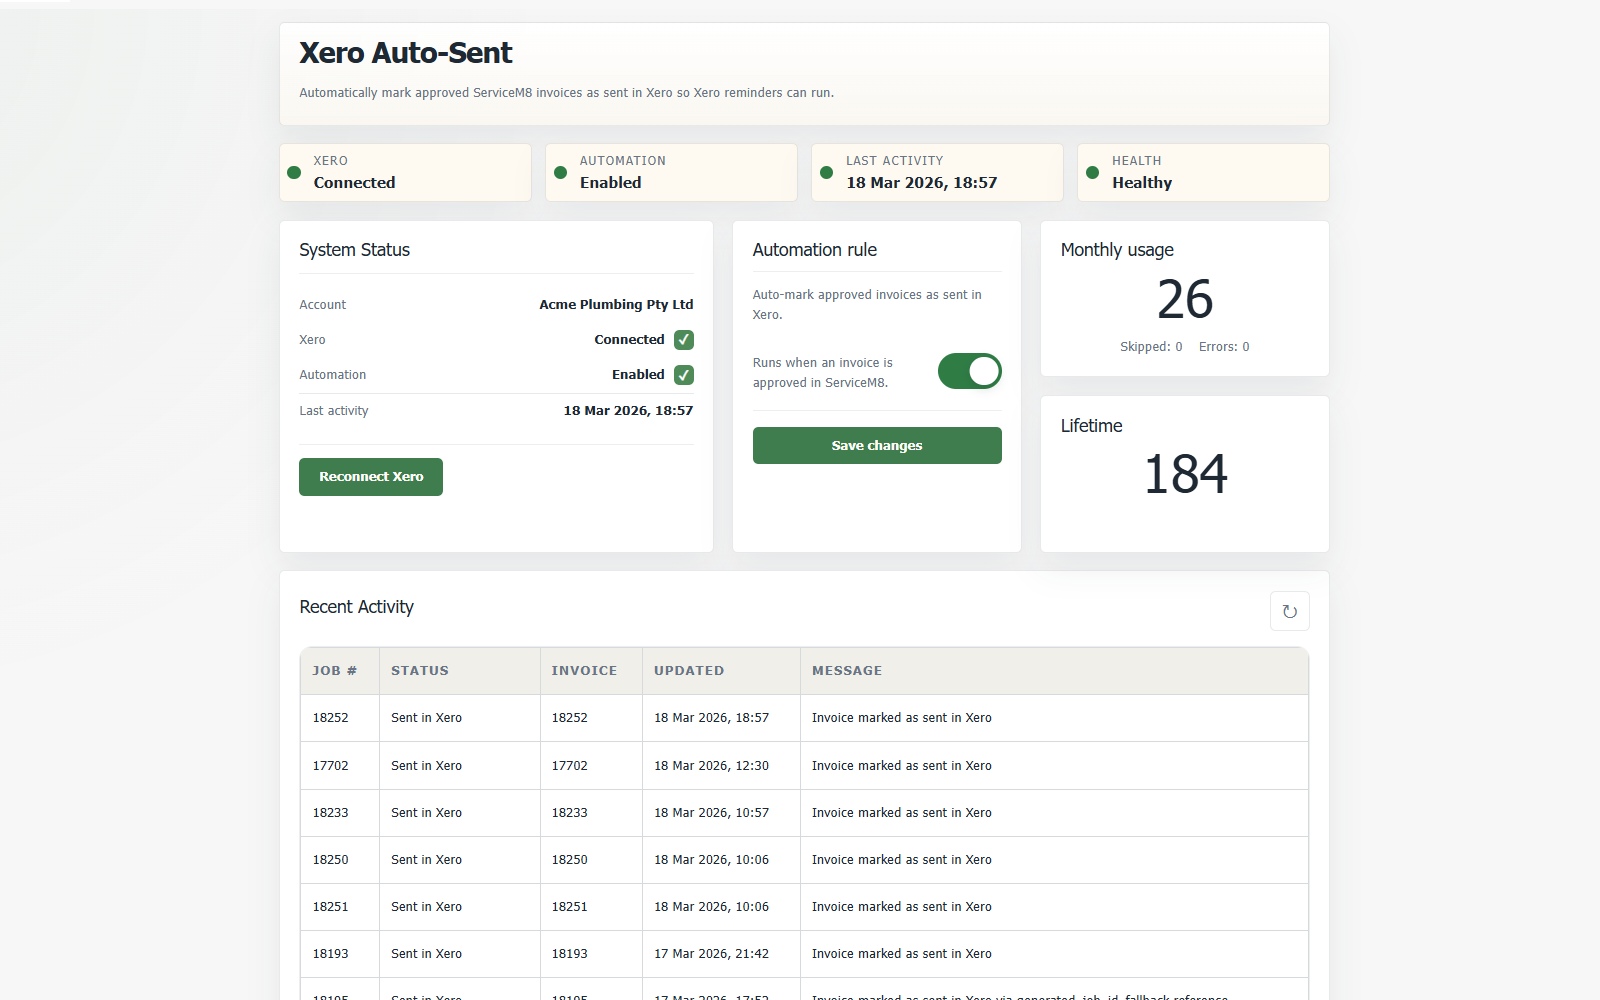
The first screen a customer sees after opening the add-on inside ServiceM8, including account status and workflow controls.
Xero connected state
Connection view
 Connected Xero account state
Connected Xero account state
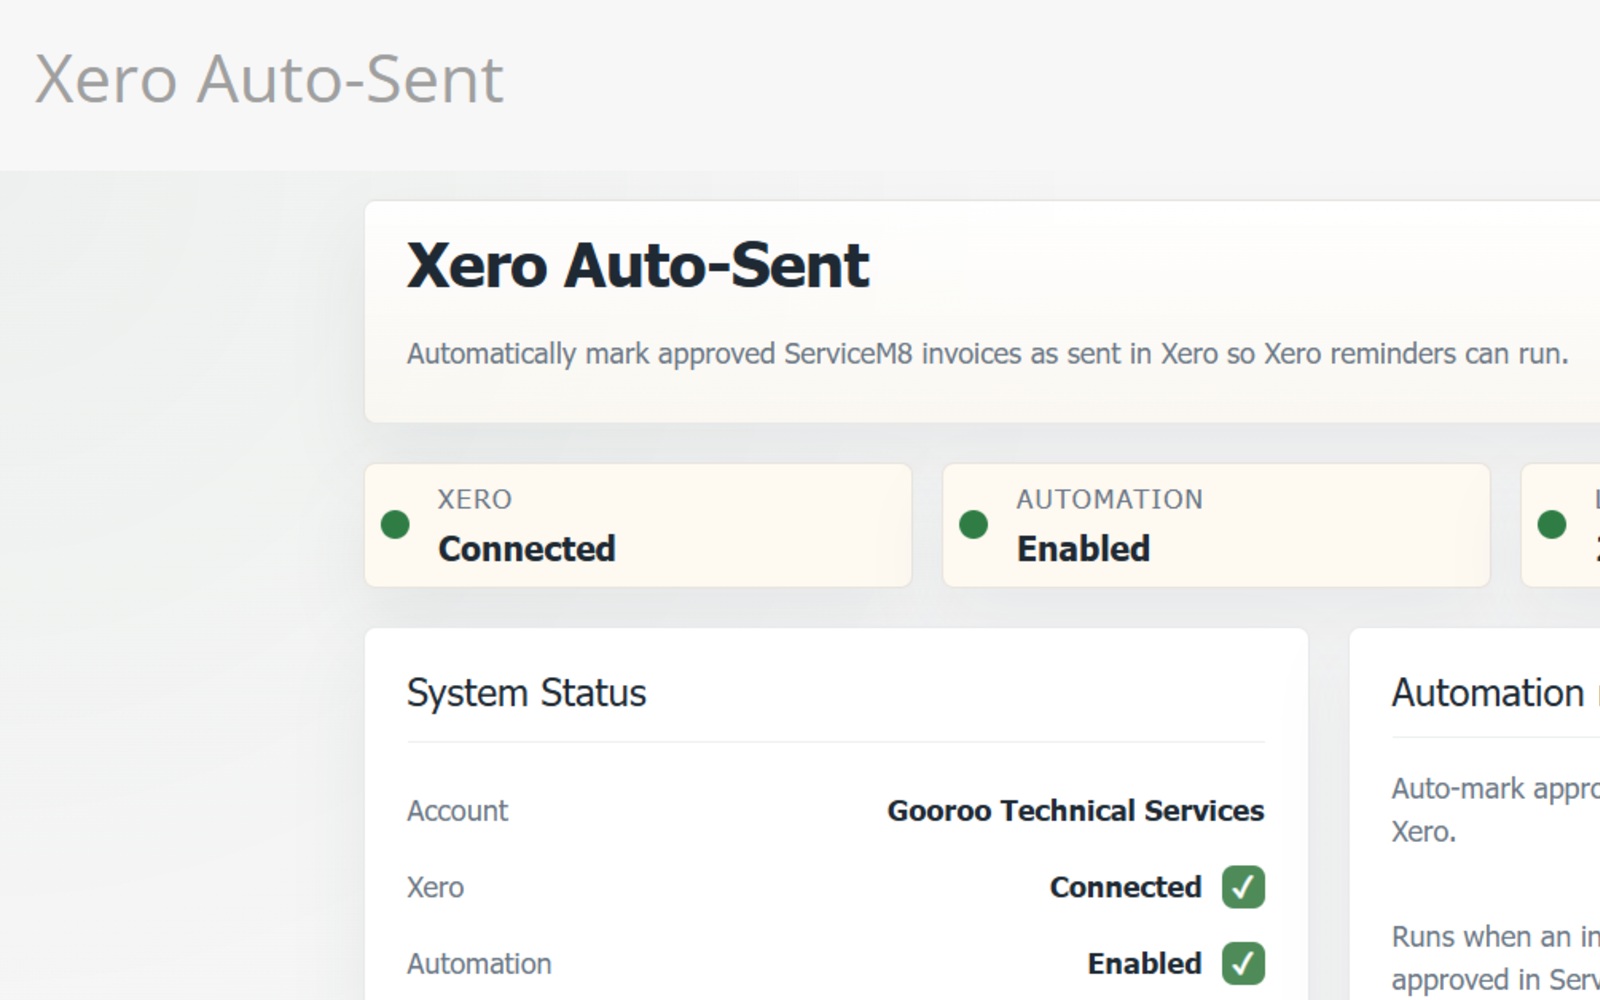
A clean demo account view showing that Xero is connected and automation is available.
Dashboard guide
The add-on dashboard is designed to make the current state of the workflow easy to understand.
What the current account is doing
Shows the connected Xero account, whether Xero is connected, whether automation is enabled, the current billing label, monthly usage, lifetime processed count, and recent activity timing.
Enable or disable automatic sending
Use this control to decide whether the add-on should continue automatically marking eligible invoices as sent in Xero so reminders and related automations can better run as intended.
Understand what happened last
Recent activity can show outcomes such as waiting for Xero, sent in Xero, already sent in Xero, or needs review, helping you see whether the invoice is still unsent in Xero or ready for Xero automation to continue.
Dashboard Location
Dashboard path
 Open the add-on from ServiceM8 Desktop
Open the add-on from ServiceM8 Desktop
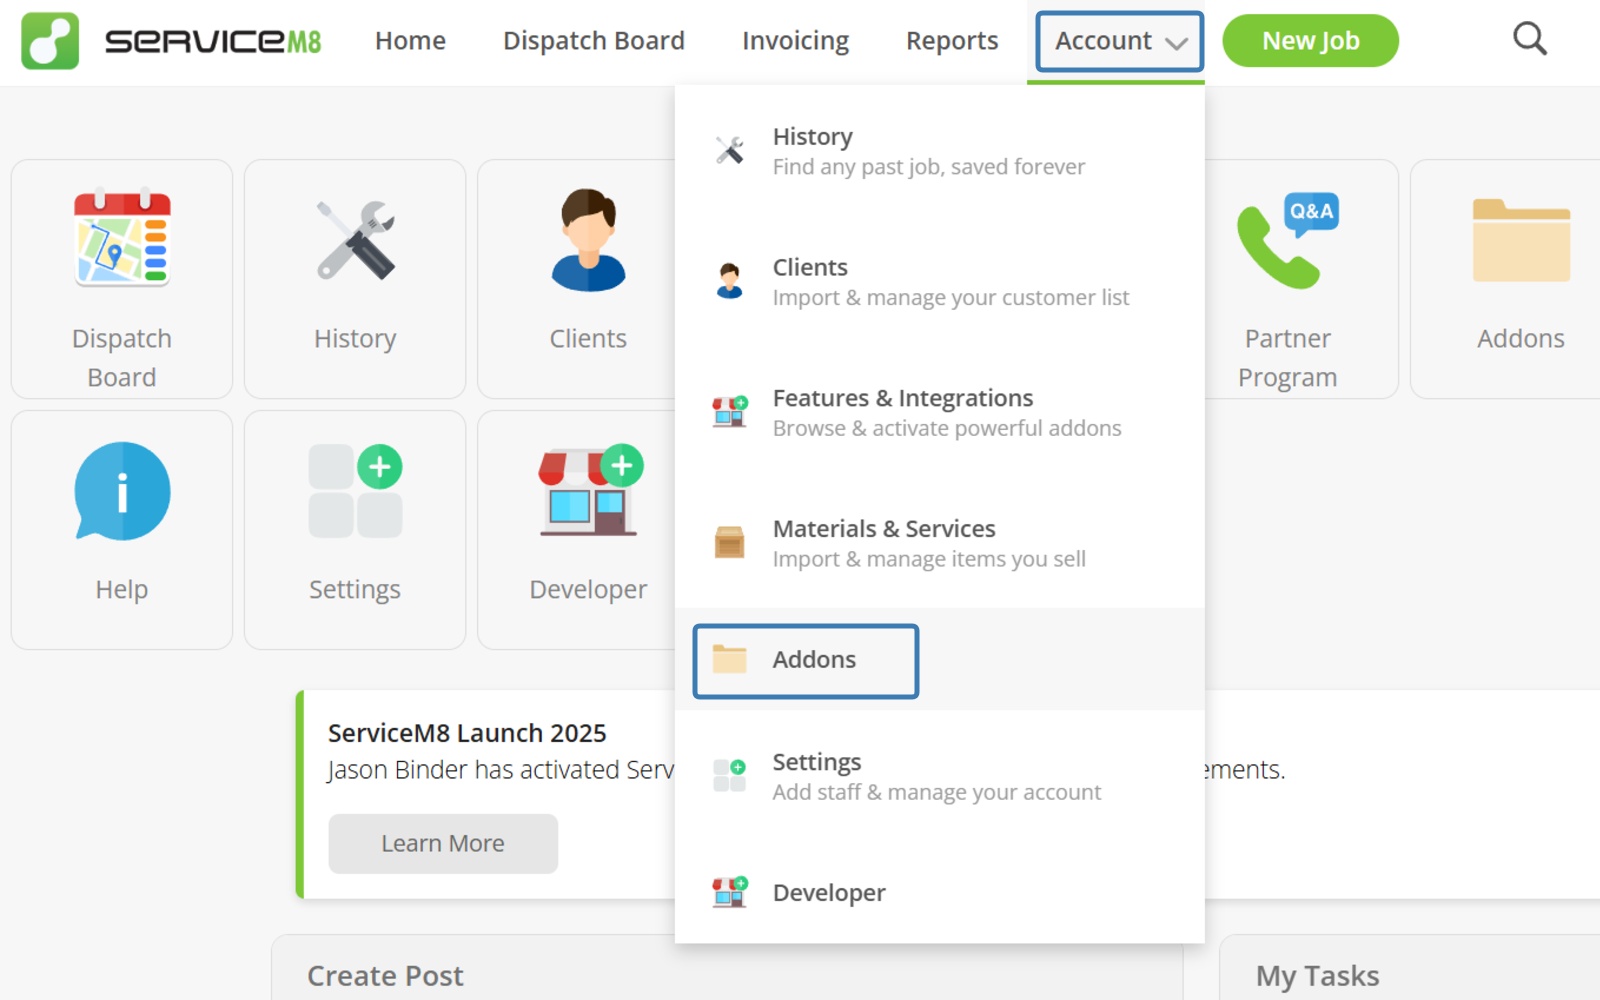
From inside ServiceM8 on Desktop, use the menu bar and go to Account >> Addons >> Xero Auto-Sent to open the main dashboard and controls for the add-on.
Recent activity table
Recent activity screenshot
 Recent invoice outcomes
Recent invoice outcomes
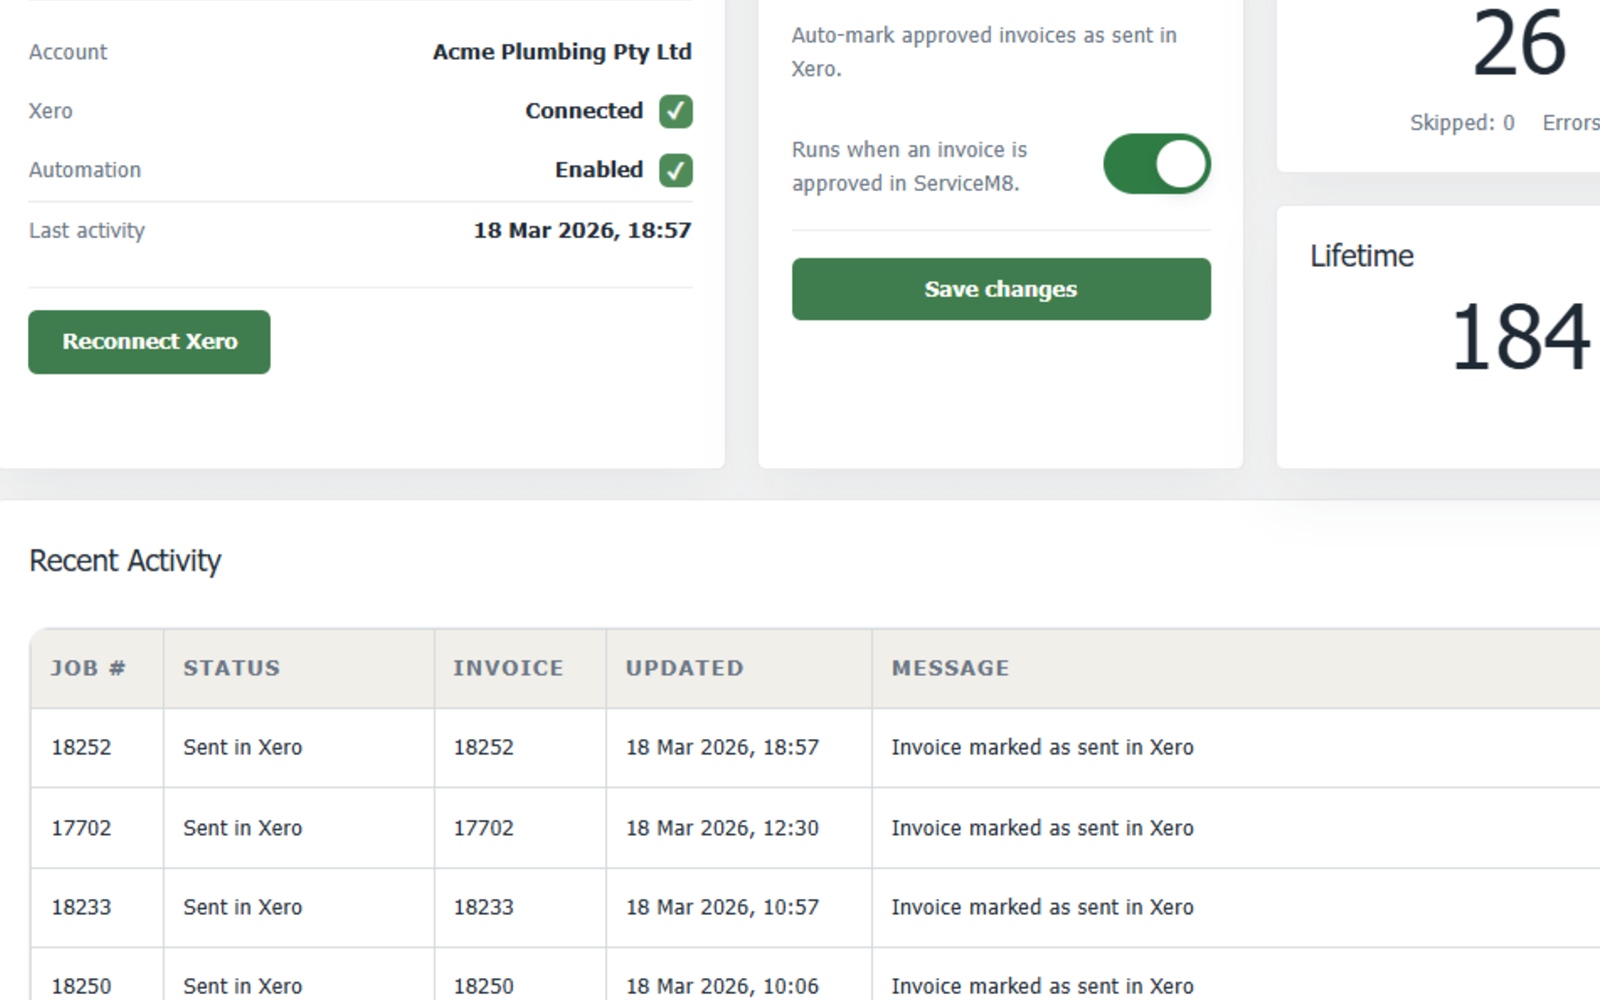
A closer dashboard view showing activity states such as waiting, sent, already sent, or needs review.
Reconnect, disconnect, or reset
- Reconnect Xero: use this if the Xero connection has expired or been removed.
- Disconnect Xero: removes stored Xero access used by the add-on, disables automation, and stops future sends until Xero is reconnected.
- Reset connection data: clears stored Xero connection and operational queue state while keeping ServiceM8 access, plan history, usage history, and safe processing history.
How to stop using Xero Auto-Sent
- Disable automation or disconnect Xero in the add-on.
- If needed, separately remove the connected-app access inside Xero to revoke authorization there as well.
- Remove the add-on in ServiceM8 Add-ons.
- Billing is managed through ServiceM8 and will cease when you remove the add-on.
Need troubleshooting?
Use the troubleshooting guide when the workflow does not look right.
The most common issues are invoice timing, session expiry, disabled automation, or a missing invoice in Xero. The troubleshooting page covers those scenarios directly, including when Xero still shows the invoice as unsent.
Support
[email protected]
For onboarding help, setup questions, or store-review support relating to Xero Auto-Sent.